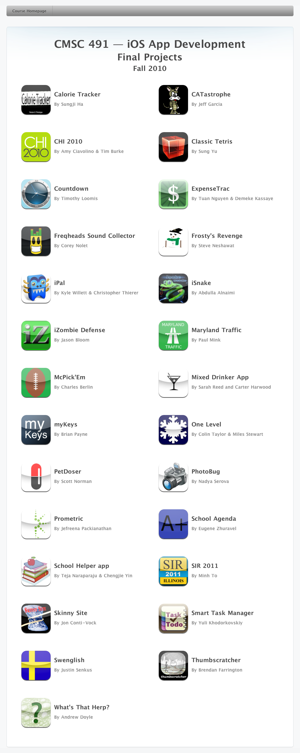
All of the mock app store submissions have been posted online.
Lecture 27 — App Performance
December 7, 2010 — DanFinal Project — Presentation & Demonstration
December 4, 2010 — DanDue Date (for Slide Submission)
Wednesday, December 15th — 11:59pm
Background
Final project presentations and live demonstrations will occur during the time allotted for the final exam (Thursday, December 16th 6–8pm). Each group will be scheduled a 3½ – 4 minute chunk of time for their presentation and demonstration. This time limit will be strictly enforced. The specific order of presenters will be determined next class.
Your presentation should consist of a minute or so of slides which present an introduction to your application, followed by an actual live demonstration of your app.
Your slides must be in PDF format and should contain the following content…
- Title slide — consisting of app icon, app name and team member names
- App Description slide — a one slide overview of your application
- Frameworks, Libraries & 3rd Party Services slide — a one slide that lists frameworks, libraries or services used by the app and mentions what they were used for
- Backup Demo Slides — in the event that something fails during your live demo, you should have screen captures that are capable of being used as backup
Your demonstration should highlight the key features of your application. You are strongly encouraged to rehearse your demonstration ahead of time.
Demo Information
I will be building and installing all apps into the iPhone Simulator on my laptop for the demonstration. To ensure a smooth demo, I recommend the following…
- When testing your app, I would strongly suggest that you remove your app from the simulator and try a fresh build & install before submitting to avoid any issues caused by (lack of) residual artifacts.
- Perform a dry run on the demo hardware — I will be holding special office hours Tuesday, December 14th 5:30–6:30pm where you can stop by and do a dry run on the actual machine that will be used for the demos.
If your app requires features that are not supported on the simulator (such as camera, accelerometer, etc.) email me as soon as possible so we can make the necessary accommodations.
Submission
To submit your slides, open up a terminal, navigate to the directory containing your slides then issue the command:
submit cs491i final-slides slides.pdf
Final Project — Mock App Store Submission
December 4, 2010 — DanDue Date
Tuesday, December 14th — 11:59pm
Background
If you were publishing an application on the App Store, you would need to provide information about your app for submission. To simulate that experience, you will prepare a mock App Store submission.
For this write up I’ve provided a zip file which you must use as a template for writing up the details of your app. This zipfile includes an HTML file that when viewed in a web browser displays a page similar to that on the App Store.
All mock App Store submissions will be aggregated and posted on the course blog prior to the final presentations.
Zip File Structure
The zip file contains the following directory structure…
appstore/
|-- resources/
|   |-- images/
|   `-- ...
`-- username/
    |-- 1.png
    |-- 2.png
    |-- 3.png
    |-- 4.png
    |-- 5.png
    |-- Icon-175.png
    `-- index.html
You’ll be doing all your work under the username directory (which you’ll rename). The contents of the resources directory are supporting files referenced by the index.html document and should not be edited.
Modifications
You will need perform the following…
- Rename the
usernamedirectory to your myUMBC username. Multi-person teams should hyphenate the names (e.g. user1-user2). - Replace
Icon-175.pngwith a 175px x 175px PNG icon for your app. - Replace
[1-5].pngwith 3-5 screenshots from your application. Screenshots should adhere to the following size constraints…- iPhone & iPod touch — 320px x 480px (portrait) or 480px x 320px (landscape)
- iPad — 360px x 480px (portrait) or 480px x 360px (landscape)
-
There are several things you need to edit in the
index.htmlfile. Each item that needs to be updated has been tagged with a “TODO:” in the comments (use a text editor and search). These include…- Replace “App Name” with the actual name of the app (2 places)
- Update “John Doe & Jane Smith” with the actual author(s) (2 places)
- Replace the sample description with a description of your app. Do not use any special HTML or emoji within the paragraphs. If your app requires features found on certain devices (i.e. a camera) state so in the description. Do not include testimonials or reviews like you may see in some descriptions.
- Update the Website link to your web page (or remove the link)
- If you do not include 5 screenshots then remove the links for the extra screenshots (again, you must include between 3–5)
- Identify the category that best fits your application — a full list can be found in the comments
- Modify the list of devices to reflect the devices your app supports
- If your app required iOS 4.1 or iOS 4.2.1, then update the iOS requirements to reflect what is needed
Tips
- iOS News and Announcements for iOS Developers — App Store Tip: Creating A Great Presence on the App Store
- See the “Use the App Store to Your Advantage” section in the iTunes Connect Developer Guide for app store submission tips
- Browse the App Store from within iTunes or preview apps online to get a feel for descriptions used by apps on the store
Submission
Once you’ve made the changes to the provided HTML file and swapped out the sample icon and images with your own package it up by zipping up the entire directory tree.
To submit your mock app store submission, open up a terminal, navigate to your zip file then issue the command:
submit cs491i final-appstore appstore.zip
Final Project — Source Code Submission
December 4, 2010 — DanDue Date
Monday, December 13th — 11:59pm
Grading Criteria
Grading criteria for the final project will be based on the criteria from the week-long assignments…
- Correctness of application
- Appearance of application
- Adherence to Objective-C and iPhone coding conventions
- Neatly formatted and indented code
- Well documented header files
- Absence of significant performance issues
- Absence of memory leaks
…as well as…
- Scope — Is the app sufficiently complex? Does it deliver what was proposed?
- Polish — How polished is the app? Does it have a launch screen image? Does it have an app icon? Are high-resolution Retina display graphics included? Is the app appropriately named? Is the user experience well thought out?
- Interesting, novelty and uniqueness — Is the app interesting, or is it just a remake of an already existing app? What’s the overall coolness factor?
- Required Elements — Does it contain multiple views? Does it persist some form of data?
- Suggested Elements — Does it contain sound effects? Does it contain animation?
Submission
Like all of the short projects this semester, you will need to submit your source code and necessary resources for grading. You should remove your build directory and zip up the directory containing your Xcode project.
To submit your final project source code, open up a terminal, navigate to your zip file then issue the command:
submit cs491i final-code project.zip
Using Subversion with Xcode
December 3, 2010 — DanWith several people working in teams on the final project I thought I’d post how to setup and user Subversion (SVN) with Xcode. Like other IDEs, Xcode allows you to perform version control from within the IDE.
The following was derived based on notes provided by Amy Ciavolino — thanks Amy!
Setting up a Repository
If you want to use SVN, you’ll need to have access to a SVN repository online somewhere. You could host your own SVN repository, or if you’re creating an open source project you could leverage Google Code which will provide free public SVN access. Setting up a new SVN repository with Google Code is pretty painless. Create a Projectto get started.
Adding a SVN Repository to Xcode
- To add an Xcode repository to Xcode select SCM (from the menubar) → Configure SCM Repositories…
- Under the Repositories tab, click + to add a new repository…
- Under Name enter the name you want to give the repository and be sure that Subversion is selected under SCM System
- Enter all of your SVN credentials into the dialog (substituting your own values)…
- If all goes well, you’ll see the repository added to your list of SCM repositories…
Importing a Project
- Before you can import, you’ll have to have added the SCM repository to Xcode
- From the repositories screen, select the Import button from the toolbar
- Browse to the folder that contains the Xcode project and select Import
- If all goes well you’ll get a message indicating that the import was successful…
Checking out a Project
- Before you can check out, you’ll have to have added the SCM repository to Xcode
- From the repositories screen, select the Checkout button from the toolbar
- Browse to the directory you want to store the project, select a name for the folder, then then select Checkout
- If the checkout goes well, you get a message asking if you want to open the checked out project in Xcode…
- You’ll need to do is to tell Xcode that you want to perform SCM operations against the repository you checked out from. To do so, select SCM (from the menubar) → Configure SCM For This Project
- From the General tab click the Configure Roots & SCM… button (top right)
- Select the repository from the drop-down that you’d like to perform operations against, then press OK like so…
- After having performed a checkout, various SCM functions are now available off of the SCM menu item (e.g. commit, update, diff, etc.)
Additional Information
Lecture 25 — iPad
November 30, 2010 — DanSource code from this lecture:
- MapsHD.zip
- MapsHDModal.zip
- MapsHDPopover.zip
- VideoGamesHD.zip
- Universal.zip (expanded upon what was shown in lecture)
- SplitView.zip (modified split view shown in class that uses a UINavigationBar instead of a UIToolbar)
